
First order of business with the new Transit Connect is draining and refilling the transmission. It has a sporadically rough 2-3 shift, and has signs of a leaking driver’s side axle seal leak. There’s also no evidence of the fluid ever being changed, so we’re going to do it right away.
Note that I fully expect to replace the transmission at some point, but hopefully not too terribly soon.
The process below is derived from the procedure in Ford’s workshop manual, modified for a DIYer without access to a lift.
Parts/Tools Needed
- Jack
- Jack stand
- Catch pan
- T30 Torx driver (for splash shield)
- Ratchet and sockets for drain and fill plugs
- Lug wrench (and any wheel lock adapter that might be necessary to remove the wheel)
- At least 4 quarts Mercon LV transmission fluid
- Funnel with attached hose
Procedure
- Unplug mass airflow sensor. Then remove the transmission vent from the fill tube.
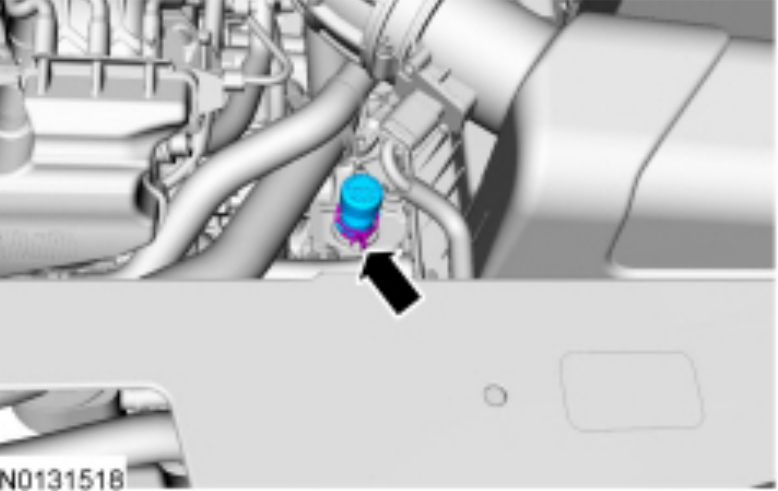
Transmission Vent - Break lug nuts loose on driver’s side front wheel, then raise front left corner of vehicle and support with a jack stand.
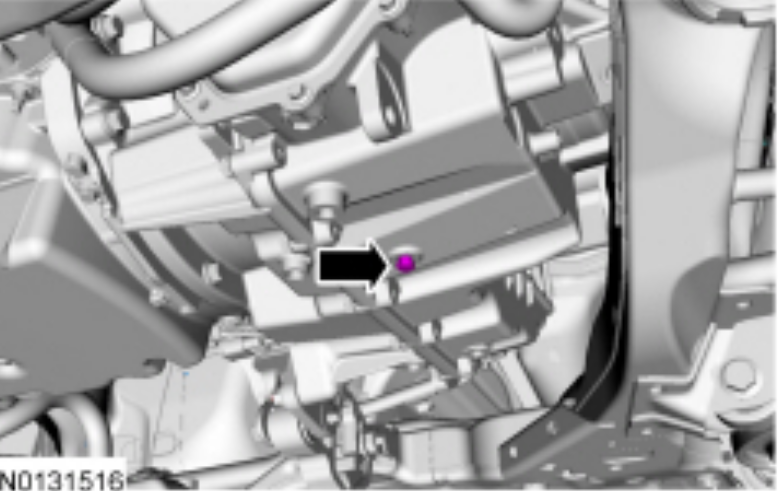
- Locate transmission oil leveling plug and loosen but do not remove. NOTE: The reason for doing this first is that if you have trouble getting the fill plug loose, you find out while the transmission still has fluid in it, instead of being stranded with an undriveable vehicle.
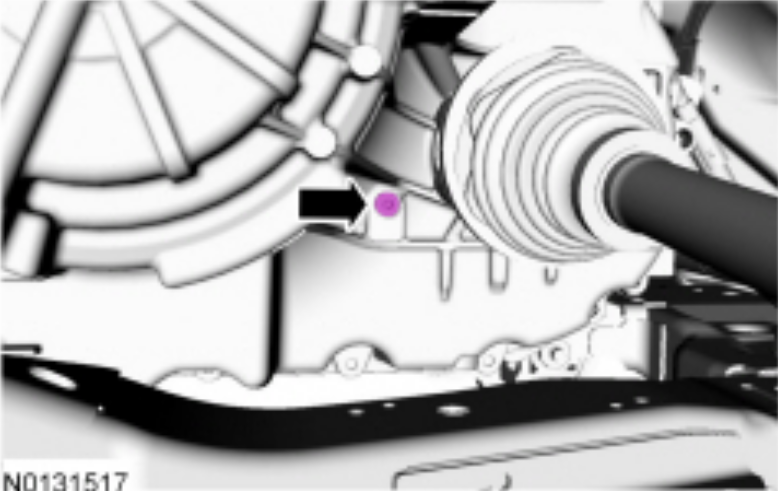
Oil Leveling Plug - Remove 7 or 8 screws holding engine splash shield on using a T30 Torx driver. Slide cover toward rear of van to unhook rear tabs (if stock cover is present).
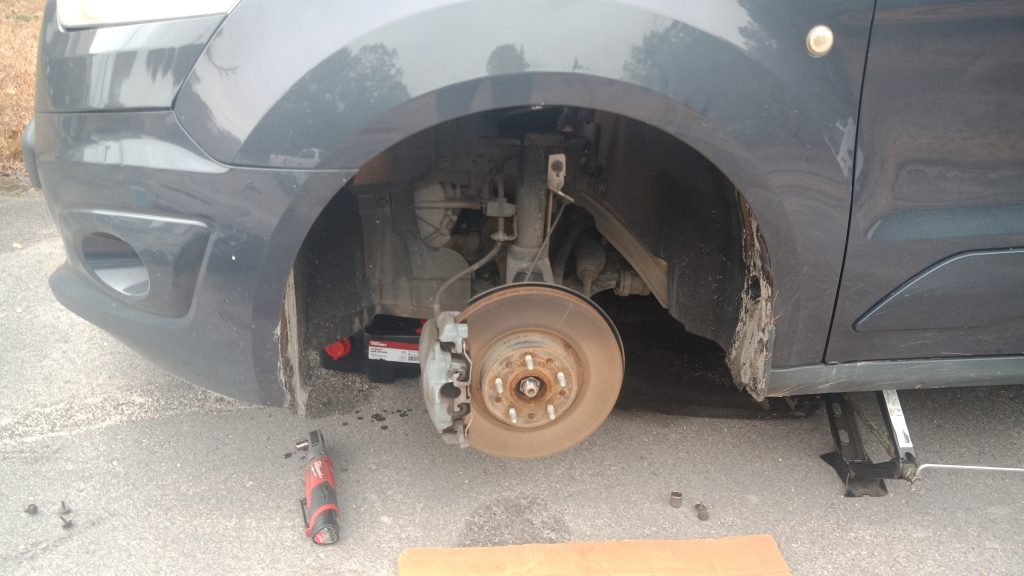
- Place a catch pan with sufficient capacity under drain plug, loosen drain plug and allow transmission fluid to drain. If you suspect transmission problems, you may want to use a paper filter to catch any pieces of metal or friction material that may clue you in to future problems.
Transmission Drain Plug 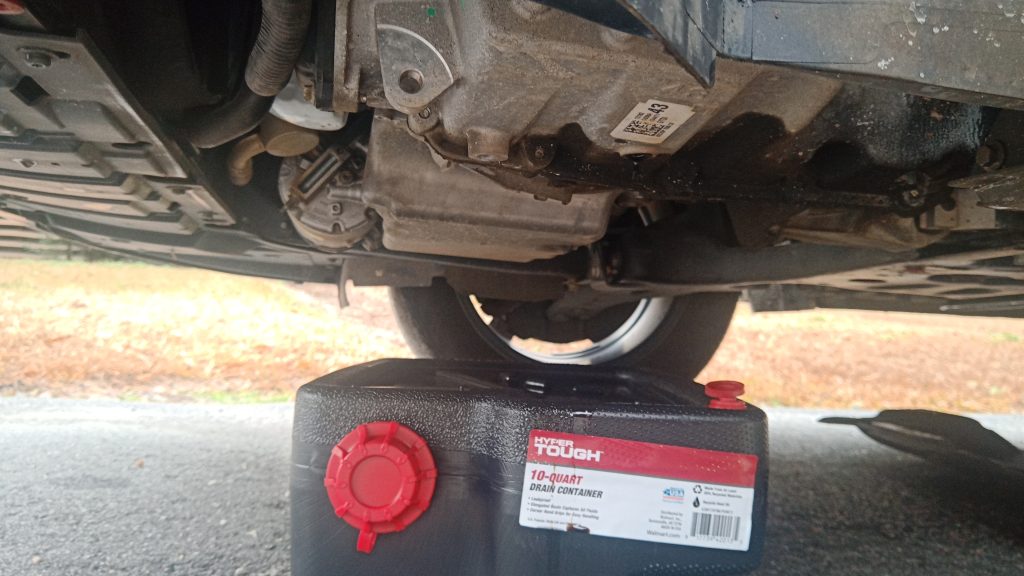
Drain plug removed, notice leaking from axle seal. - Reinstall drain plug.
- Slowly add 4 quarts of Mercon LV fluid through the vent using a funnel.
- Lower jack (without wheel on) so that vehicle is level from left to right.
- Reconnect mass airflow sensor connector.
- Start the engine, and move gear selector slowly through each gear, stopping in each position and allowing the transmission to engage. Shift back to park.
- With the engine still running and the vehicle still level left to right, place a catch pan under the left side of the transmission and remove the transmission fill plug, allowing fluid to drain until it’s even with the oil leveling plug hole. If fluid doesn’t drain when you remove the plug, add fluid in increments of 1/4 quart until it does. Reinstall the plug, and tighten to 8Nm (71 lb-in).
- Reinstall the transmission vent, and raise vehicle enough to reinstall driver’s wheel.
- Install driver’s wheel, then lower vehicle and drive until transmission is at normal operating temperature (5-10 miles should be plenty).
- Raise vehicle support with jack stand, remove driver’s wheel, lower vehicle to level, and remove leveling plug. Allow oil to drain into catch pan, then reinstall plug. Again tighten to 8 Nm (71 lb-in).
- Reinstall engine splash shield, using care not to overtighten screws. Note that 2 of the screws are shorter–these go just forward of the wheels, in the holes that have metal speed nuts instead of red plastic inserts.
- Reinstall wheel, remove jack stand, and lower vehicle. Make sure to properly torque lug nuts.
While you’re in there, consider:
Changing engine oil
Inspect driver’s side axle seal for leaks
Upgrade the engine splash shield
Replace/upgrade torque strut (also known as lower rear motor mount)
Replace plastic splash shield retainers and/or missing screws
Inspect brake pads, tie rod ends, ball joints and control arm bushings